
01
Start instantly
No account, card or setup is needed to look around.
How it works
Your private wedding website is created straight away. Make it yours, organise the guest details, preview everything, then launch one simple link for everyone you invite.
Build and preview before you launch.
Try it first
The demo opens straight on the planning dashboard. Change the words, guest list and settings freely to see how everything feels. Photo uploads invite you to create your own site first. Nothing is published and your practice changes are not saved for other visitors.
01
No account, card or setup is needed to look around.
02
Try editing text and adding guests exactly as a couple would.
03
Creating your own site gives you a private website to save and launch.
1. Create
Private from the start
2. Customise
Template, colours & fonts
3. Organise
Guests, events & RSVPs
4. Add gifts
Photos, words & links
5. Launch
Finalise and share your link
1. Try it free
Enter both names, your email and a password. We create your web address, home page and planning dashboard immediately, so you can start exploring without paying first.
1 of 2
A complete default home page is waiting as soon as signup finishes. Only you can see it until you launch.
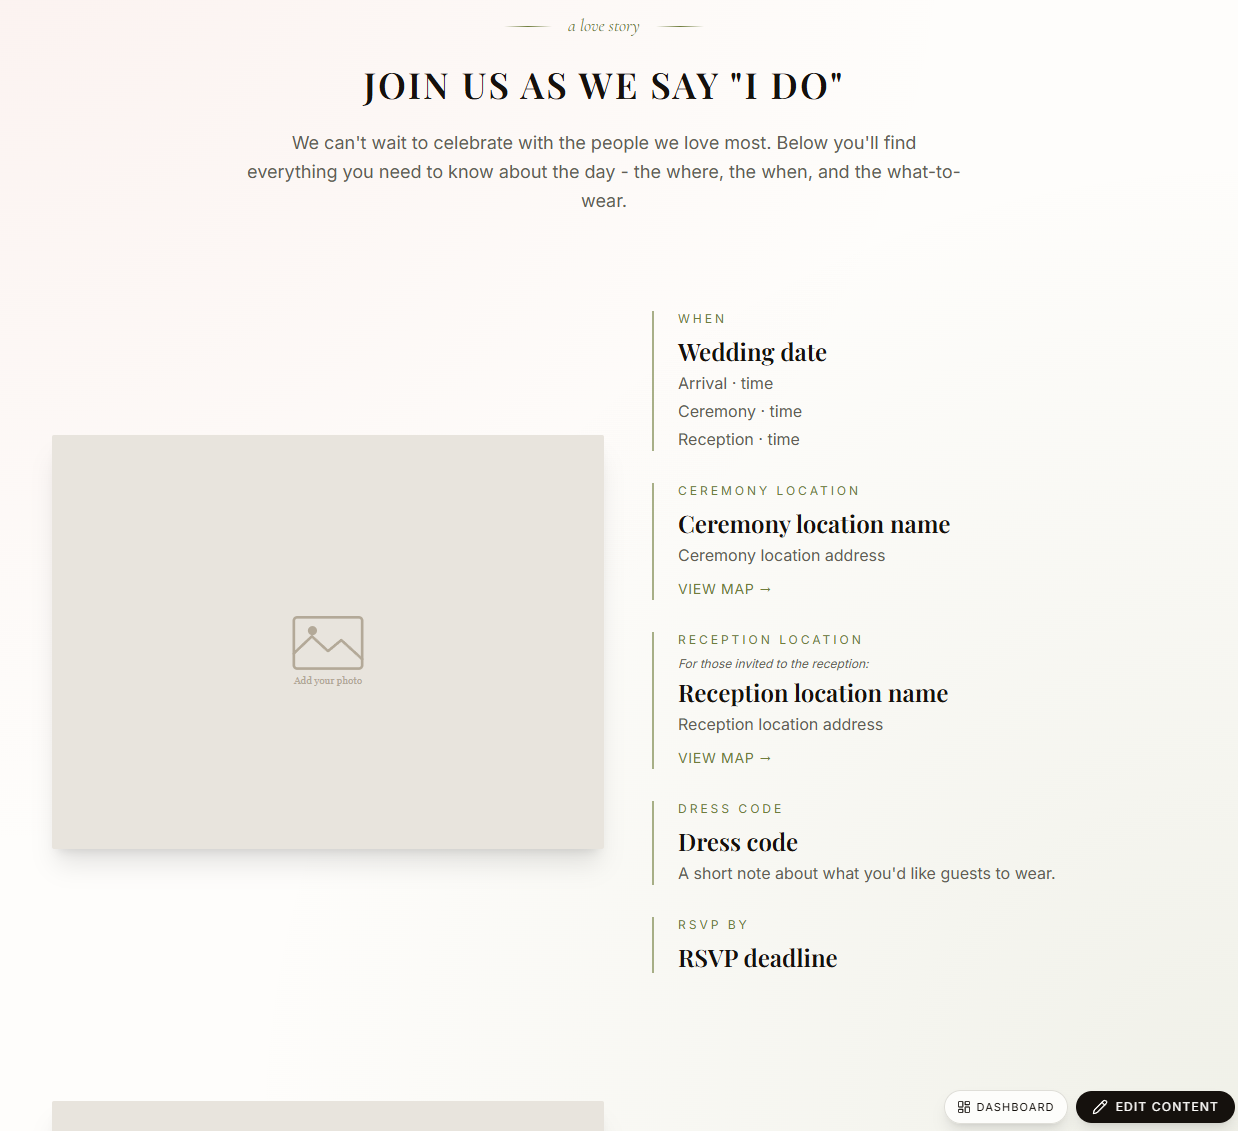
Use the arrows to see the default home page and dashboard
Guests cannot visit until you choose to launch.
A useful starting site is created as soon as signup finishes.
Preview, edit and change direction before sharing anything.
2. Make it yours
Pick a home page template, set your fonts and colours, and choose which pages guests will use. Verify your email to unlock photo uploads, then replace the sample words and pictures with your own. Everything saves as you edit.
1 of 3
Start with the layout that feels closest to your day. Your words and details stay editable.
3. Organise your guests
Paste in a whole list or add people one at a time. Put households together, choose who is invited to the ceremony or reception, and follow every reply from the dashboard.
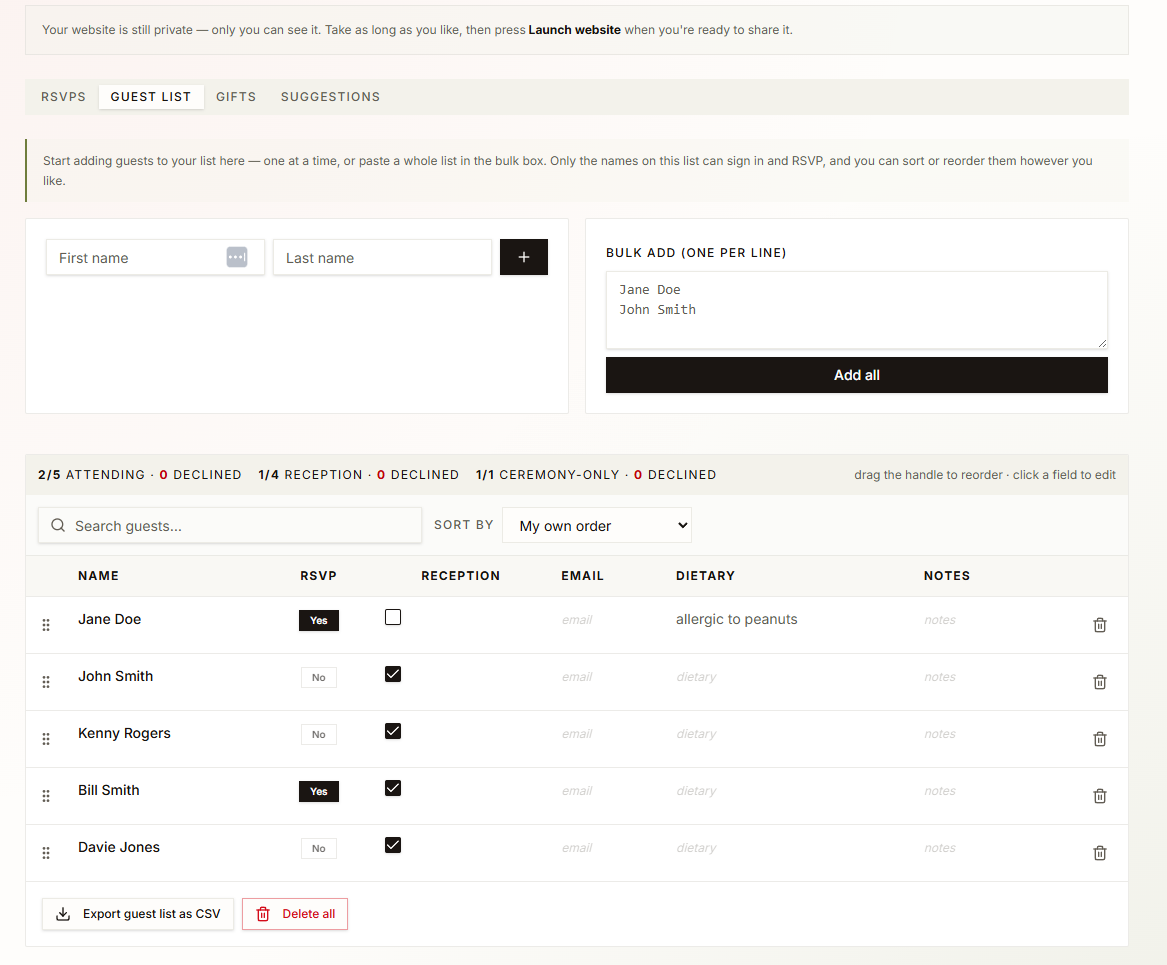
Your guest list and response dashboard
4. Collect RSVPs
Guests start typing their name and choose the right match. They only see the events and questions relevant to their invitation, while you choose which extra details to collect.
Joined.love
Please reply by 20 September
Start typing your name, then choose it from the matches.
Interactive guest RSVP demo
5. Build your registry
Add a photo, description and optional product link for each idea. There are no prices on the guest registry and no requirement to use a particular shop. Guests can claim an item privately so it is not bought twice.
Joined.love
If you'd like to give us a gift, you can claim something below.
No prices or store lock-in. Couples choose the wording, photo and optional link.
Interactive gift registry demo
6. Launch
Keep previewing privately for as long as you need. When everything feels ready, press Launch website, double-check your Joined.love address and complete secure checkout. Your website then opens to anyone who has the link.
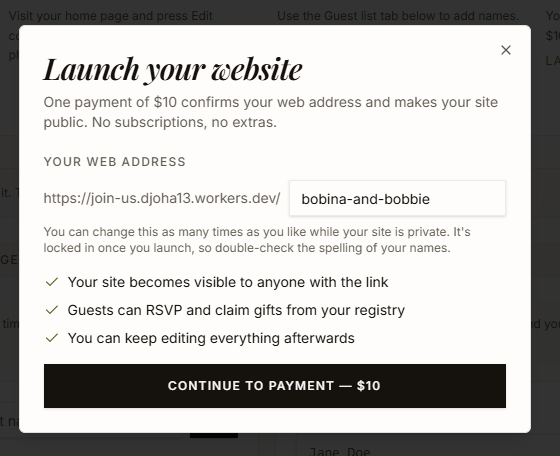
Review your address before launch
Create the starting site now, then take your time choosing the words, pictures and details that make it yours.